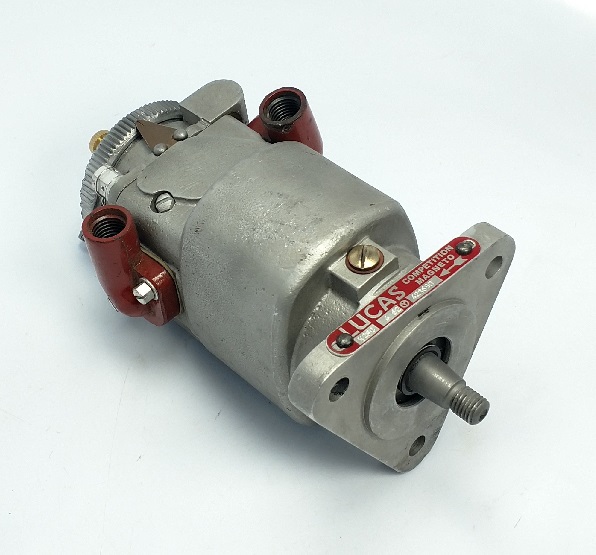
Lucas Magneto Troubleshooting
Credit – Brightspark Magnetos Ltd
Click Here to view KF Lucas parts manual
Click Here to view Lucas face cam (magdyno) parts manual
DIY Magneto Maintenance and Troubleshooting
A fair amount maintenance and troubleshooting of a magneto can be done with the magneto in situ and without any special tools or equipment other than a multimeter. In this series of pages, we’ll take you through the main things. If you’re giving your magneto a thorough check over, we suggest you tackle jobs in the order shown. If your magneto is loosing spark after a short amount of time running, or is hard to start it is most likely a condenser failure. This is really common on original units as the Lucas condensers were made from wax paper and foil. These are prone to deterioration and the cause of many ignition faults. BTH mags utilized condensers made from mica. Some original units are still in service today. It is almost a given that a Lucas armature will require replacement if in the original condition. All rewound units now have modern condensers and enameled wire.
Pick-up, HT Lead and Plug-cap – 1
Undo the contact-breaker centre-screw and remove the contact-breaker assembly. This disables the magneto to reduce the risk of electric shock and fire.
Remove the pick-up(s) from the magneto taking care not to mislay the gasket(s).
Check the condition of the HT lead(s) and plug-cap(s) and replace where necessary. If there is a quickly-detachable connection between the HT lead and pick-up, undo it and check the condition of the connection.
Check that the spring of the pick-up brush is good, that the brush is free to move in its holder and that it is not unduly worn in length or diameter. Replace if necessary. Do not skimp on quality with pick-up brushes.
If the brush is missing or there is only a very short piece in the pick-up, the brush (or part of it) may have come out and dropped to the bottom of the magneto housing. In that case, it it best to dismantle the magneto to retrieve it.
Oil on the inside of the pick-up is usually indicative of a failure of the magneto’s oil seal, in which case the magneto will need a more complete overhaul. However, if the outside of the pick-up is also oily, perhaps it’s all caused by an engine oil leak.
A lot of carbon dust on the inside of the pick-up indicates that the brush is too soft, in which case it should be replaced with a brush of the correct grade.
Thoroughly clean the pick-up using a rag moistened with petrol.
Carefully check for any cracks or pin-holes in the pick-up. If there are any, replace the pick-up.
With a multimeter, check the resistance between the tip of the pick-up brush and the terminal in the plug cap. It shouldn’t be very many ohms, and certainly less than 30 ohms. If it is several thousand ohms, it indicates that the HT lead is resistive and/or the plug cap is fitted with a suppressor resistor. We recommend using non-resistive (copper) cable and unsuppressed plug caps. If the resistance is higher than about 15,000 ohms, it indicates a bad connection.
Possibilities are:
the brush spring is not touching the terminal in the pick-up holder;
the connection between the cable and the pick-up is corroded;
the screw in the plug cap has gone down the side of the HT cable and not down its centre;
a faulty plug cap.
Slip-ring
If you can see the slip-ring through the pick-up hole in the main housing, check that the brass ring or segment of the slip-ring is brass coloured (albeit possibly a bit dirty or tarnished), but not completely black. With twin- or multi-cylinder magnetos, and some single-cylinder magnetos, the brass is a segment, rather than a complete ring, and you may need to rotate the armature in order to be able to see it. If the brass is black, it indicates that the brush(es) are too soft and/or years of neglect.
IMPORTANT. If you haven’t already done so, undo the contact-breaker centre-screw and remove the contact-breaker assembly. This disables the magneto to reduce the risk of electric shock and fire.
Wrap some rag around the end of a stick about 1/4″ diameter, moisten it with petrol or other cleaning fluid (but not so much that it is dripping), poke it through the pick-up hole in the magneto body, and rotate the armature to clean the slip ring. Repeat with clean pieces of petrol-moistened rag, until the rag comes out clean.
Now let the slip ring dry out with the pick-ups still removed.
Contact-breaker Assembly
Having removed the contact-breaker assembly from the magneto, disassemble it, noting where each part was.
Check the state of the points surfaces. If necessary, dress the points on a fine stone. The points surfaces should be very slightly convex, so don’t worry about getting them perfectly flat. However, don’t make them lop-sided. Even if the points surfaces look good, clean them with fine emery cloth to remove any oxide layer. Then wash the points with petrol and dry them.
Ring cam versions:
Check the state of the contact return spring and replace if broken.
Clean and grease the moving-point pivot. If not free to move, ease it. If sloppy, consider fitting a new moving point (Lucas), bush (BTH), or pivot post.
Check the state of the heel of the moving-point assembly. If excessively worn, replace the heel (BTH), or the moving-point assembly (Lucas).
If an earth brush is fitted behind the back-plate, check that the spring is good, that the brush is free to move and that it is not unduly worn in length or diameter.
Face cam versions:
Check the state of the tappet and replace if necessary. Put a smear of grease on the tappet shaft.
Check that the felt pad in the end of the screw holding together the two blocks of the points assembly is present and good, and soak it in oil.
If the magneto is fitted with, or about to be fitted with, a Brightspark EasyCap, you can perform some basic checks on the EasyCap.
With your multimeter set to display resistance and connected to the opposite faces of the circuit board of the EasyCap (and with your fingers touching no more than one side of the circuit), the meter reading should climb up from a low value until it goes off the scale (OL). If you have an auto-ranging meter, the reading might jump about a bit on the way while it changes scales.
If your multimeter can measure capacitance, the reading should be within 10% of:
150 nF (0.15 uF) for the C01, C02, C03, C05 and CU/150 EasyCaps;
136 nF (0.136 uF) for the C04 EasyCap;
220 nF (0.22 uF) for the C06, C07 and CU/220 EasyCaps.
If you have a Megger or similar insulation tester, set it to test at 500V. The resistance between the two sides of the circuit board (with your fingers well clear) should climb to in excess of 2 GΩ (2000 MΩ).
If your magneto does not have an EasyCap but it fitted with a condenser buried in the armature, then it is impossible to check the condition of the condenser, while the armature is assembled, without specialised equipment.
Check that all the insulators are in good shape, and reassemble the contact breaker assembly.
With the contact-breaker assembly still removed from the magneto, and with a multimeter set to measure resistance, check that with the points closed there is a short circuit between them (as close to 0 Ω as your multimeter goes). Also, with the points open, check that there is an open circuit between them; if fitted with a Brightspark EasyCap, it will take a little while for the resistance reading to climb off the scale.
Cam
Check the cam surface. If it has any unusual marks, try to work out what caused them and whether anything should/could be done about them.
Manual advance/retard versions:
Remove the cam, carefully noting which way round it goes and which notches in it engage where.
If there is a lubricating felt, soak it in oil.
If there is a groove where a lubricating felt should be, but is missing, consider making and fitting a replacement.
Disassemble the advance/retard mechanism carefully noting which part goes where. Check for wear and replace any worn parts. Grease. Reassemble and check operation.
Put a smear of grease on the surface of the cam that engages its housing.
Replace the cam, ensuring that the notches in it engage as before (e.g. with a fixed register in the cam housing and with the advance/retard actuator).
Check that the advance/retard mechanism reliably rotates the cam back and forth.
Put a smear of grease on the lobe(s) of the cam.
Internal HT Continuity
With a multimeter, check the resistance between the brass of the slip ring and the end of the armature shaft (‘armature earth’).
Make a note of the reading; you’ll need to refer to it later.
Values vary considerably depending on the make and model of magneto and who wound it. However, if the reading is more than 7000 ohms, there is probably either a break in the HT winding, or a bad connection between the live end of the HT winding and the slip-ring. If the reading is less than 3000 ohms, it would be unusual, but is indicative of a problem. In either case, the magneto needs a more complete overhaul.
Main-body Earth Brushes and Bearing Insulators:
Some magnetos have an earth brush between the contact-breaker back-plate and the contact breaker housing. This was examined earlier. Others have an earth brush between the main body of the magneto and an earth track of the armature. Some have both types of earth brush.
With some magnetos, the main-body earth brush is accessible with the magneto in situ. For example, in the Lucas K1F and K2F, the earth brush is located on top inboard of the main mounting flange. In the Lucas MO1, it is on one side, adjacent the contact-breaker housing. With the Lucas KN1, it is under the identification tag. With other models, it may be inaccessible while the magneto is in situ, for example underneath.
If there is a main-body earth brush and it is accessible, remove it and check that the spring is good, that the brush is free to move in the holder and that the brush is not unduly worn in length or diameter.
If you are sure that all earth brushes are removed, and if either the magneto has a fibre drive pinion or the drive pinion/sprocket has been removed, you can now check the effectiveness of the bearing insulators. To do this, measure the resistance between the magneto body and the end of the armature shaft. If everything were perfect and clean, the resistance should be infinite (OL). However, provided the reading is more than about 500 ohms, it is probably OK. Replace the main-body earth brush, if applicable.
Contact-breaker Re-installation and Points Setting
Re-install the contact-breaker assembly, ensuring that it registers properly with the armature shaft. It should fit properly in only one precise position. While holding it in that position, tighten the centre screw, but do not use undue force. Then check that the contact-breaker assembly is not wobbly on the end of the shaft.
Ring cam versions:
Rotate the armature and check that the contact- breaker spring never touches the cam.
With Lucas devices, the fixing hole at one end of the contact-breaker spring is slotted so that the effective length of the spring can be adjusted as necessary.
Rotate the armature and check that, when the points are fully open, the moving point assembly is not fouling anything.
With Lucas devices, if it fouls the contact-breaker spring, the contact-breaker assembly will need to be removed and the effective length of the spring increased as necessary.
With BTH devices, if the moving point assembly fouls the eccentric pin, the pin will need to be adjusted.
Face cam versions:
Rotate the armature and check that the contact-breaker assembly does not foul its housing.
Housings can sometimes get misshapen, in which case try to rectify that.
Also, some pattern contact-breaker assemblies are too large at the ‘fat’ end and need to be filed or ground to size.
With the points fully open, adjust the points gap to 0.012″ (0.3 mm).
Twin- and multi-cylinder magnetos:
The points gaps with the heel at the centre of each lobe of the cam should be the same, but a small difference is inconsequential.
If there is a difference, adjust the points so that it is the smaller gap that is 0.012″ (0.3 mm).
Place a clean piece of strong paper between the points, and with the points closed pull the paper out. Check for any dirty marks on the paper. If there are any, repeat until the paper comes out clean.
Open the points and blow between them to dislodge any remnants of paper.
Low-tension Continuity
Rotate the armature until the contact-breaker points are open.
Measure the resistance with the two probes of your multi-meter shorted together. The reading will probably be a fraction of an ohm.
Then measure the resistance between the two points of the contact-breaker.
The reading should be between 0.5 and 0.7 ohms greater than your first reading.
If it is significantly higher, there is a bad connection or break in the low-tension circuit, in which case the magneto will need a more complete overhaul.
If it is significantly lower, then there is probably a short-circuit in the contact-breaker assembly or in the armature. So, re-check everything in the contact-breaker assembly first before deciding on a more complete overhaul.
Earth Brush Continuity
With the earth brush(es) now replaced, measure the resistance between the back-plate of the contact breaker assembly and the main body of the magneto.
The reading should be less than 30 ohms.
If higher than that, investigate. For example:
Check as best you can that the brush is actually making contact with the track on which it runs.
In the case of a main-body earth brush, try moistening a cotton bud with petrol, and poke it through the hole for the earth brush to clean the track while rotating the armature, but IMPORTANTLY before doing that temporarily remove or disable the contact breaker to reduce the risk of electric shock and fire.
Complete High-tension Continuity
Now that the slip ring has dried off, replace the pick-up(s).
Nearly all magnetos have a gasket between the pick-up and the magneto body (a) to prevent water entry and (b) to set the correct clearance between the pick-up holder and the slip ring. Ensure that you have the proper gasket fitted.
Single-cylinder magnetos:
Turn the armature in its proper direction of rotation until the contact-breaker points are just starting to open.
Measure the resistance between the magneto body and terminal in the plug cap.
The reading should be substantially the same as the reading you obtained in the ‘internal HT continuity’ section.
Twin- and multi-cylinder magnetos:
Turn the armature in its proper direction of rotation until the contact-breaker points are just starting to open on one of the cam lobes.
Measure the resistance between the magneto body and terminal in one and then the other of the the plug caps.
One of the plug caps should give a reading which is substantially the same as the reading you obtained in the ‘internal HT continuity’ section.
The other plug cap should give a reading that is infinite (OL) or extremely high.
Turn the armature in its proper direction of rotation until the contact-breaker points are just starting to open on the other cam lobe.
The readings for the two plug caps should now be swapped around.
If you do not obtain readings substantially the same as the reading you obtained in the ‘internal HT continuity’ section, and if everything else you previously checked is still good, it indicates that the pick-up brush(es) is/are not making good electrical contact with the brass of the slip ring. This could be because:
the brush isn’t projecting far enough to touch the slip ring, so check that as best you can.
the brass is in the wrong place, as a result of a magneto with a segment-type slip-ring having an incorrect cam fitted or having the wrong direction of slip-ring fitted. You can check the latter by removing the pick-up(s), rotating the armature in the proper direction until the points are just opening, and checking that the brass is visible directly underneath the pick-up hole (or one of the pick-up holes) in the magneto body.
Will It Spark?
At atmospheric pressure, the voltage required to strike a spark across the 0.020″ (0.5 mm) gap of a sparking plug is far less than the voltage required at the elevated pressure that the plug experiences in the engine’s cylinder. Therefore, taking the sparking plug(s) out of the engine, laying them on the cylinder head and checking whether the magneto will produce a spark at kickstart speeds is not a sufficient test.
Also, many magnetos (especially twin- and multi-cylinder devices) are provided internally with safety gaps, typically of 6.5 to 7.5 mm, and if the magneto can’t find an outlet through whatever is or isn’t connected to it, it happily sparks the safety gaps instead. However, for magnetos without a safety gap, if the armature is spun with nothing, or with a large gap, connected to the pick-up, it may cause a breakdown of the insulation around the HT winding or of the slip ring. Once the insulation has been broken down once, it often makes it easier for it to be broken down again.
We would therefore strongly advise against ever trying to make a magneto strike a spark across a gap of anything in excess of 7.5 mm in fresh air. With larger gaps, if the magneto is provided with a safety gap, the spark is more likely to jump there where it can’t be seen, so that’s a waste of time. If not provided with a safety gap, there is a risk of expensive damage.
Our preferred gap for spark testing in fresh air is 6 mm.
If working on your own, holding the end of the HT cable steady 6 mm from the engine is difficult when kicking the starter. If possible, get somebody to help. If nobody is available, then you can make a test plug by removing the earth electrode from an old, but functional, sparking plug. That then produces a gap of about 4 mm between the centre electrode and the screw-threaded bit of the plug body. Not quite as large as ideal, but simple.
If the magneto won’t produce a spark across a 6 mm (or 4 mm) gap at leisurely kicking speeds, and if you’ve satisfied yourself with all the other checks described earlier, then it probably needs a more complete overhaul. The likely culprits are:
failure of the condenser;
breakdown of the HT insulation; and/or
breakdown of the slip-ring insulation.
Timing
Set the timing of the ignition in accordance with the machine’s handbook.
Twin- and multi-cylinder magnetos:
Having set the timing with the points opening on one cam lobe, you should check that it is also correct with the points opening on the other cam lobe.
This is best done using a strobe.
If the timing is not correct on both lobes, the reason could be that:
the contact-breaker assembly is wobbly on the end of the armature;
the cam is loose in its housing;
the armature is loose in its bearings;
the cam or its housing were incorrectly machined (rare);
the cam has worn unevenly (rare);
with ring-cam magnetos, the armature and cam are not coaxial due to the outer race of the bearing at the contact-breaker end not being seated properly by its insulator in the cam housing.
The last of these possible reasons is very often the cause.
Pick-up, HT Lead and Plug-cap – 2
DO NOT ATTEMPT THIS IF YOU ARE FITTED WITH A PACEMAKER, OR HAVE A HEART CONDITION, OR IF YOU REALLY HATE ELECTRIC SHOCKS.
With the engine running, place your hand over the pick-up with the same hand also touching the magneto body.
If the pick-up is retained by spring clip, swing it to one side while holding the pick-up in place.
You should not feel any tingles in your hand. If you do, then replace the pick-up.
With a twin, repeat with the other pick-up. Do similar tests with the HT lead(s) and the plug-cap(s).